 Pencil sketching is one of the most neglected lessons in art in Elementary classrooms. Often students would come to my art classes in Jr. or Sr. High after years of doing crafts, and they would complain that they couldn't do art, be it painting, or perspective drawing, or sculpting, because no-one had ever taught them to draw! Adults attempting to do art, maybe for the first time, have the same complaint. Drawing is a skill that anyone can learn. Like any other skill, the more you practice it, the better at it you get. Moreover, sketching and drawing takes time; a typical assignment might require three or four hours working on the same drawing. And students are always amazed at how well their first effort turns out, after putting in all that time. The first lesson in any art class should be how to 'sketch', rather than draw. This is a very important skill. I'll explain the difference in a moment, but let's look at the tools needed first. 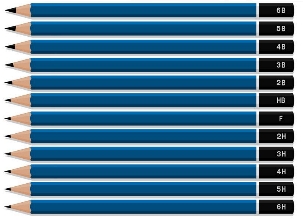
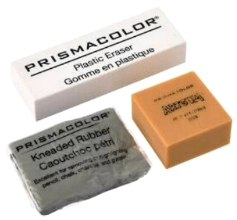
 Pencils A full range of hardness in pencils for each student is not necessary; one set like the one pictured above could do for four or five students. Here's what the pencil designations mean. The degree of hardness of a pencil is printed on the pencil. The letters are preceded by numbers, making an even more precise measure of the degree of hardness. The higher the number, the softer (B) or harder (H) the pencil will be. In practice, this is usually an unnecessary distinction; for our purposes, 3B through 7B, for example, will be interchangeable. By the way: lead has never been contained in graphite pencils. They consist of a mixture of clay and graphite. Find out how pencils are manufactured here. People who want to express themselves artistically use soft pencils of hardness grades 2B to 7B. You can make expressive drawings with them, which are very rich in contrast. They are easy to erase. Our lesson will use HB and 2B. Hard pencils are good for technical drawing. Hardness grades 2H to 6H are excellent. Because they do not lubricate, you can work with them very accurately. Their lines are more grey than black. Do not press too hard, though, as the pencil may dig pressure marks into the paper. We won't be using H pencils. Here's what each grade looks like in use: 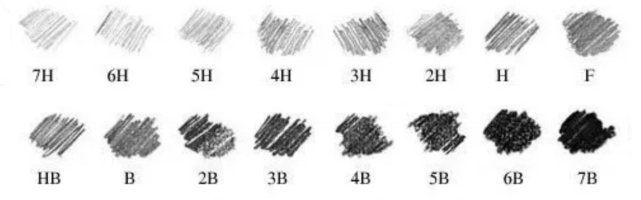 If you don't have graded sets of pencils, ordinary HB pencils work just fine if students don't press too hard. Erasers Standard pink erasers don't work when sketching; they don't remove enough of the pencil graphite from the paper. Also, so-called 'ink erasers', which are gritty, remove not only the graphite, but the paper underneath too!
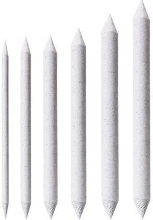
There are three kinds of eraser that work well: Smudgers
Smudgers are tightly wrapped sticks of newsprint and come in various sizes. Students will need several fine ones and a larger one, and can share if needed.
Smudgers are used to blend areas that have been shaded with a pencil. This makes the drawing look more realistic as it blends out the pencil strokes. They are also used to apply shadows.It is best not to use your fingers to blend ares of your drawing. First, for small areas your fingers are too big. Also, the oil on your skin may make that area uneraseable. And most importantly, the graphite that's transferred to your fingers will likely end up on your drawing as fingerprints, which are next to impossible to remove from a nearly finished sketch! A useful trick is to take a very soft pencil (4B) and shade darkly on a separate piece of paper, making sure there is a lot of graphite on the paper. You can rub a smudger in this to get graphite on the end, to apply to a picture for shadows. You can buy small sandpaper blocks for sharpening your pencil, but I've found that simple dollar-store sharpeners with a cover for collecting the shavings work just fine. Now for the first few lessons in learning to draw. Move on to page two |