 Page Three 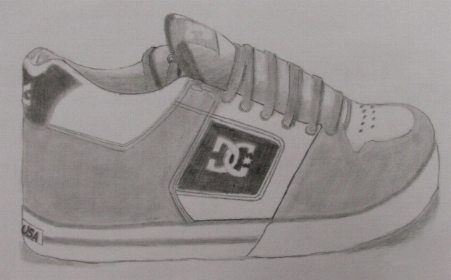 Students are going to draw their shoe! The drawing above was made by a student in grade nine who, like most of the others in the class, professed to having no art ability whatsoever. The drawing you see here was the result after about five 40-minute classes. Centred on a standard sheet of regular paper, it took up about half of the sheet (in landscape view). Some students produced more life-like shoes. Others not so much. All were astounded by the drawings they'd produced. There's no miracle here. The principles that make this work include: they'd never spent that much time on a single drawing in their lives! Step 1: Getting the shape right Students need the same shoe for five classes. It should be an interesting one; runners work best. Set it up on the desk so they're looking slightly down at it. Start the sketch by drawing the outline of the shoe. This is the most important step; if the shape is wrong, it needs to be erased and drawn over and over again until it looks right. Get other people to look at it and make suggestions. This step could take a full 40 minute class. Still sketching very lightly, add big details in the correct places. Sketch in shoelaces, sole line, the tongue, and other distinctive features. When the shape and details look correct, go over the lines to make them darker. Then erase all the left-over sketch lines. Step 2: Shading for colour Some parts of the shoe are different colours. Shade them with a very soft pencil (4B). Blend the areas so pencil lines don't show. Clean up around them with an eraser. Step 3: Shading for shadow Some areas are dark because of shadow, especially inside. Use a blending stick (add graphite to it first if necessary) to make them dark. Clean up the edges with an eraser when done. Step 4: More details Before continuing, make sure all extraneous lines and messiness from blending are thoroughly erased. Now start drawing over little details that may have been hidden by shading. Finish other details that aren't done, like laces and holes, with a sharp pencil. Use a small smudging stick to show the wrinkles. Use it again to add more shadows. Keep looking at the real shoe to find things to add. This stage can take two full periods. Students should be encouraged to criticize their own work. Help them to find mistakes to fix. Get them to seek out others for their suggestions. |