  A trundle wheel is a simple device for measuring distances that are too long for a tape measure, or that aren't relatively straight. It can be used with elementary classes when making scale maps of the playground, or learning how long a hectometre is. In Jr. High math classrooms it is handy when doing trigonometry problems, drawing scale diagrams, or learning about pi.
If your school can't afford to buy one, you can easily make a good one from scrap wood. We'll show you how, and give you an idea about how accurately your trundle wheel can measure distances. The materials you will need:
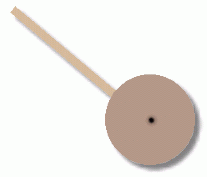
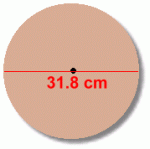
 First, cut out a circle from the piece of plywood that is exactly 31.8 cm in diameter. This is the only important part. You might need to find someone to do this part for you. If so, that person will probably know how to ensure that the piece of plywood that is cut out is exactly circular, and 31.8 cm in diameter. Drill a hole slightly larger than the diameter of the bolt, in the exact centre of the plywood circle. The circle must be exactly 31.8 cm in diameter so that the circumference (distance around the outer edge) is 100 cm, or one metre (Circumference = pi times diameter). This means the wheel will travel one metre when it has turned once. A related math activity could be to calculate the error inherent in the device over various distances. With a diameter of 31.8 cm and using pi on a calculator, the circumference of the wheel is actually 99.9 cm, rounded to one decimal place. This represents an error of one millimetre in one revolution of the wheel (one metre). See further down on this page for an error analysis based on your measuring of a 31.8 cm diameter..  Next drill a hole (the same diameter as the bolt) through the end of the piece of wood you are using for the handle. You need to attach the handle to the wheel using the nut and bolt, as shown in the diagram at the right.
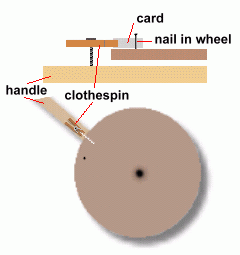
The washers are added in the spots shown to ensure that the wheel will turn freely on the bolt. Don't tighten the nut too much. At this point, you can test the trundle wheel ... it should turn easily on the ground as you push it around with the handle. Feel free to adjust the length of the handle to the size of the students who will be using it, by cutting off a piece if necessary. All that remains is to mark the wheel somehow so that you can tell when it has turned once. A painted line anywhere on the edge will work. However, the wheel is much easier to use if you can make it give off a sound every time it completes one revolution ... that way you can count metres by listening for the sound.  Do you remember attaching a clothespin holding a playing card, to the fork of the wheel of your bicycle? It made your bike sound like a motorcycle! That's what we're going to do here.
The diagram at the right shows one way you can do this to your trundle wheel. At the top of the diagram is the side view of the arrangement; the clothespin needs to be attached to the handle using a screw through the clothespin's spring hole, and extended up far enough so that it lines up above the wheel. A piece of plastic held by the clothespin will hit a nail that you put in the wheel at an appropriate spot. Then as you push the wheel around, it will click once per revolution, or once every metre. You can cover ground quickly and still count the metres easily! In actual practice, some problems we encountered were: - Holding the clothespin at the top of the screw. Not a problem if it was a tight fit. - Making sure the clothespin won't turn on the screw. You might have to glue it. (We used duct tape) - Finding a piece of plastic that is stiff enough to flex and remain springy. Ice cream pail plastic worked. - Getting a noise. Keep the plastic piece short. The nail needs to be right on the edge of the wheel. O.K., now you have a trundle wheel. Depending on what you are planning to use it for, you may be wondering how accurately it will measure distances. Let's find out. We will assume that the wheel was cut out properly, and is as close to a perfect circle as possible, given the tools that were probably used to cut it. If its diameter was measured reasonably carefully, it shouldn't be more than a millimetre off. That means the diameter could be as small as 31.7 cm, or as large as 31.9 cm. Here are the corresponding circumferences and possible errors:
First, notice that even with our ideal measurement of 31.8 cm for the diameter, your wheel is a little off. That's because we assumed it was unlikely that you would be able to measure your circle diameter using units smaller than one millimetre. A more accurate wheel could be cut with a diameter of 31.831 cm. But that degree of precision is hardly necessary ... the accuracy of our wheel as shown in the table above is better than the odometer on your car ... and certainly good enough for classroom work up to grade 9. |
|||||||||||||||||||||