  Animations using clay or plasticene are easy to do, and can be completed by students in several classes. Clay animations require that students use their imaginations, create a storyboard, plan carefully, and use equipment properly, to achieve a satisfactory result. Here are the tools, materials and equipment you will need:
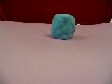
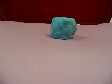
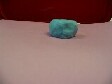
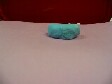
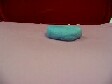
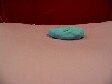
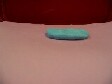
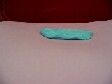
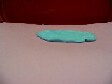
Creating the Frames: After deciding what the animation would look like, our first step was to take ten photographs of the piece of clay. After each picture was taken, we flattened the clay slightly. We planned our animation as a clay blob that flattens itself and then returns to its original shape. (O.K., not terribly exciting, but it was quick to do!) 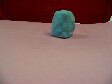
 For purposes of this illustration, and to keep the file sizes small, we resized the images, making them quite tiny. With faster computers and large storage these days, that is no longer necessary; full screen animations are now possible. We also did not use special lighting, or a tripod. You will see that this made the final animation a little 'choppy', but we still managed to obtain a decent result. GIF Animations: A computer gif animation needs a program that will preview the animation, and one to combine your photos into a single file and set the timing. As previously mentioned, we used Irfanview for previewing an animation and GIF Construction Set Professional for creting it. Gif images use just 256 colours or less, so these types of animations may produce unusual colour changes in photos of people, but are ideally suited to drawn animations. Clay animations work fine, if you ignore the backdrop and shadow colour changes.  Here's the finished product, a gif file that is just 65k in size. We used all ten images, in order, and then the same ten in reverse order. We also added a title frame. The animation could have been made much smoother by using a tripod, and by shooting more pictures and squishing the clay less between exposures. Here's the finished product, a gif file that is just 65k in size. We used all ten images, in order, and then the same ten in reverse order. We also added a title frame. The animation could have been made much smoother by using a tripod, and by shooting more pictures and squishing the clay less between exposures. The advantages of using gif animation? The process is simple, and the final file sizes are small. It is also easy to set the timing between frames, and to fix problems in the timing. Jr. High students master the program after just several uses.  Here is a small animation made by students, There are some disadvantages. Only being able to display 256 colours may be a problem, depending on what is being animated. Also, there is no way to add sound or music to a gif file.  This student animation, called 'Thirst', is a full scene that required about a hundred photos. It was quite tiny; I enlarged it here to make it easier to see, which tends to distort it a little. But you can imagine all the work that went into producing this! MPEG Movies: Mpeg (or mpg) movies allow you to add sound or music to your animation, and to retain all the colours in the original frames. The disadvantages of this format are that the program needed to create and edit videos will be more expensive, and more difficult to learn. We originally used MGI VideoWave III with Jr. High students, who needed about three to four 35-minute classes to complete and edit a video. Later, much more sophisticated video editing software became available, including the simple but quite effective Windows Movie Maker. The last time we made videos in class, I turned all of the video editing tasks over to a grade 7 student who was very good at it. Movies can be quite large in file size. While the tiny movie of this animation shown below is just over half a megabyte, in class we made videos that were hundreds of MB in size. Full screen videos now are often many gigabytes. Available below is the same animation, where we used the same 10 frames (slightly larger this time) and a sound effect, to make an mpeg movie. We didn't make any special effort to coordinate the sound with the pictures, and it still turned out O.K. The addition of sound, and the lack of colour distortion, make a much nicer animation. Also, students can use the skills they've learned to produce and edit live-action videos. A Science Fair Project: Two grade 5 students decided to try clay animation to make a video, and to display their results at our Science Fair. They chose the mpeg movie method so that they could add a music sound track to their creation. 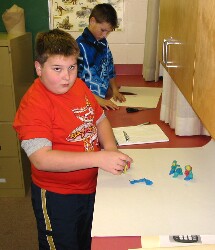 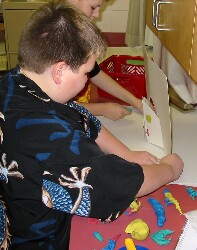 Their storyboard involved an imaginative tale of knights and dragons, many scenes, and a lot of little characters made from plasticene. They discovered while filming the first scene that keeping their characters intact between photographs, and avoiding damage while changing their characters' posture and position, was quite challenging. Nevertheless, they were able to finish one complete scene, and produce a test movie, which turned out quite well. They then created title and credit screens, and added suitably eerie music. |